Step 1
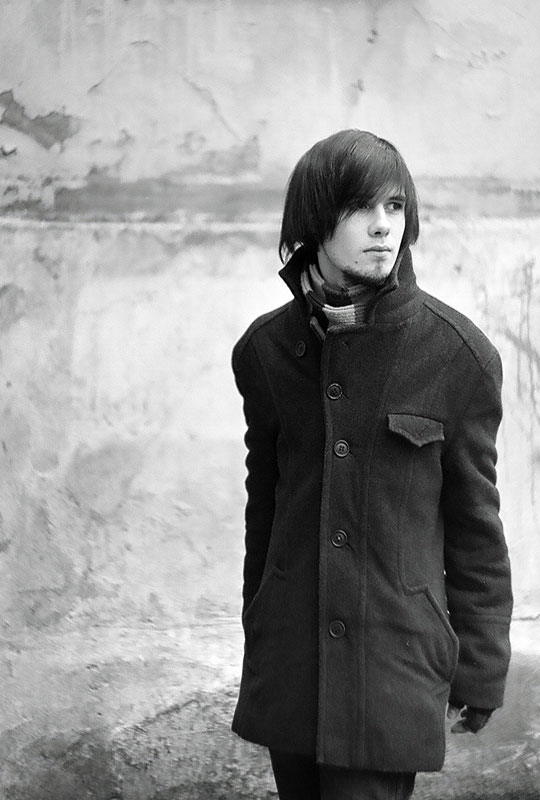
The first trick to this effect is to choose the right photo, one with a defined light source and lots of interest. The photo doesn’t have to start black and white, but you’ll need to convert your photo before we get started.I’ve opened a new document and pasted the photo into it, creating a new layer above the default Background layer which is filled with white (also by default)
Step 2
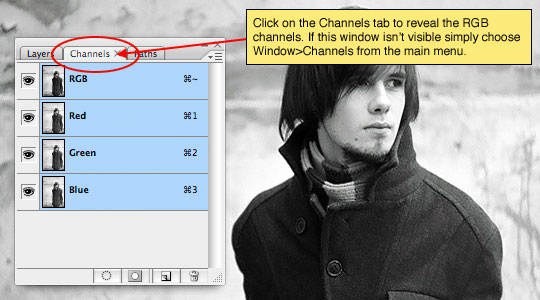
In the layers palette lets switch over to the Channels tab.(*note: For the sake of saving space some of these steps will display a cropped version of my image.)
Step 3
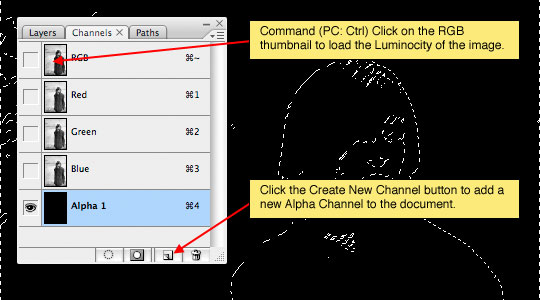
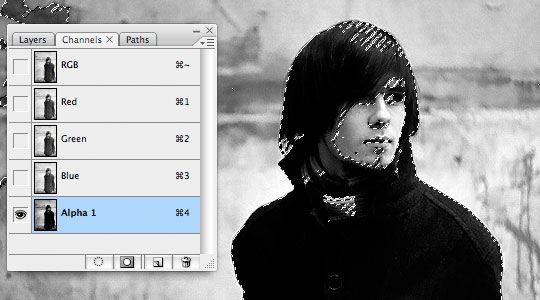
Now lets load the images Luminosity by holding down the Command (PC: Ctrl) key and clicking on the RGB thumbnail here in the Channels palette. The luminosity is the measurement of white that each pixel holds, so by loading the luminosity we’ve effectively loaded only the "lightness" of the image.Now lets add a new Alpha Channel by clicking the Create New Channel button at the bottom of the Channels palette. This will also select the new channel which will be called Alpha 1 and hide the other channels by default.
Step 4
Press the D key to reset the foreground and background colors to black and white respectively. Now lets fill the selection with white (which is the background color) by pressing Command-Delete (PC: Ctrl-Backspace). What you should end up with is something that looks exactly like the original image. Don’t release your selection just yet, we’ve got more to do with it.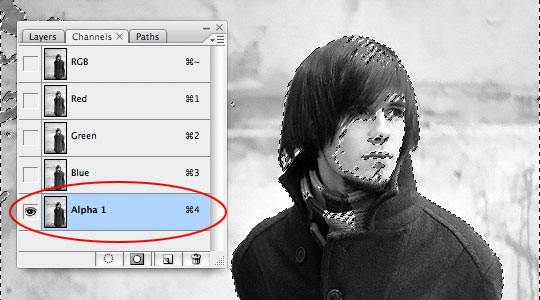
Step 5
Next lets fill the opposite pixels with black. To do this choose Select>Inverse from the main menu or use the keyboard Command-Shift-I (PC: Ctrl-Shift-I) to invert the selection. Press Option-Delete (PC: Alt-Backspace) to fill the selection with black. This will effectively darken the blacks in the image.STOP! … I see you there, reaching for the Command-D to deselect! … Don’t do it! We’re not done with this selection yet. Gosh!
Step 6
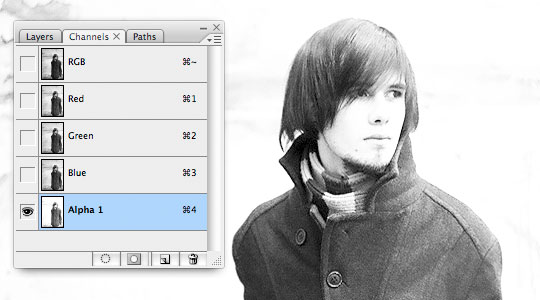
Lets invert the selection one last time just like we did before by choosing Select>Inverse or by using the keyboard shortcut you learned in Step 5.Ok, now we’re going to fill the selection with white once again, but this time lets press the keyboard shortcut three (3) times to really blow out the whites. Hold down the Command (PC: Ctrl) key once again and hit Delete (PC: Backspace) three times. And now Mr. Smarty Pants, go ahead and desect by pressing Command-D (PC: Ctrl-D)
Step 7
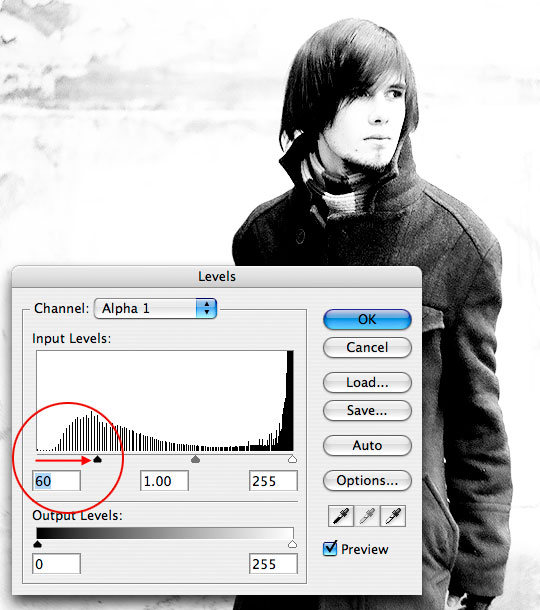
At this point everything’s going to look a little washed out and won’t have much contrast, but not to worry, we’re about to fix that.While still in the Channels palette and with the Alpha 1 channel selected press Command-L (PC: Ctrl-L) to bring up the Levels dialog box. Grab the far left arrow beneath the Levels histogram (this is the one that represents the black point of the image), drag it towards the right until the contrast returns to the image. This is a "to taste" adjustment, but I found that a setting of 60 worked nicely to restore my blacks to where they ought to be.
Step 8
Now I’m going to press Command-T (PC: Ctrl-T) to invoke the Free Transform function and enlarge and reposition my guy where I want him to be for my ad. The trick here is to choose a size and orientation that allows us to black out one side and white out the other. Finding the spot where black and white will connect is what’s coming next.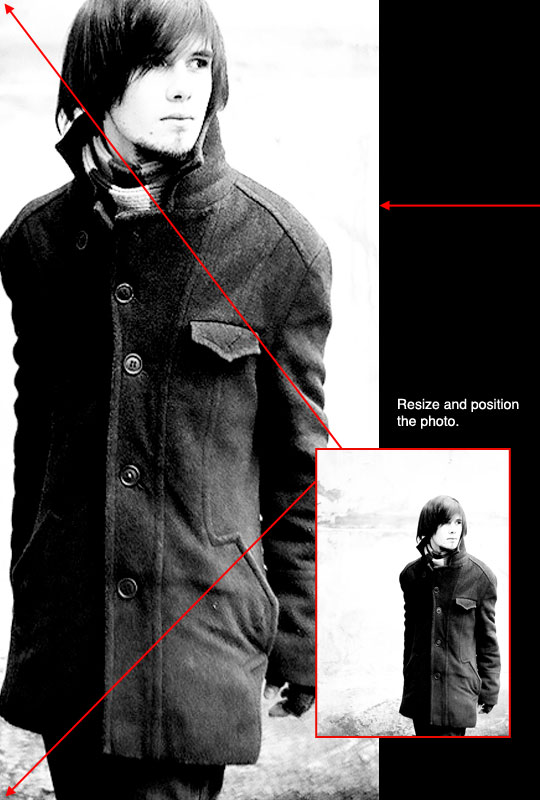
Step 9
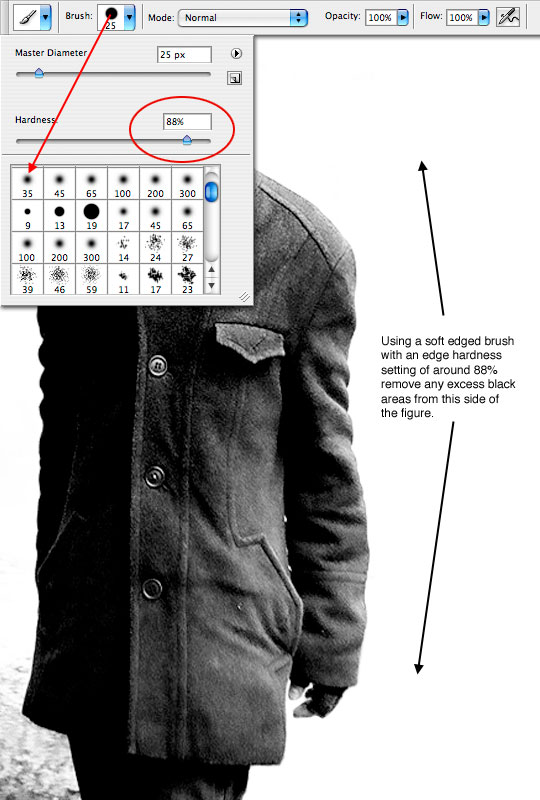
Now I’m going to grab the Brush tool by pressing the B key and then I’ll press X to switch my foreground and background colors, effectively making white the foreground color. With a variety of brush sizes I’m going to paint out all the remnants of black in the areas to the right of my figure as shown below.I’ve found that using a round soft edged brush with an edge hardness of about 88% allows me to paint very close to my subject without lightening the edges of his form. Use the Bracket keys [ and ] to enlarge or shrink your brush as you work. You can also Zoom in and out by using the keyboard shortcut Command (PC: Ctrl) and the plus (+) and minus (-) keys. Holding down the Spacebar will give you the Hand tool and allow you to move around your zoomed image.
Step 10
Now that we’ve got the right side nice and white, lets press the X key to return black to it’s position as foreground color and using the same brushes and techniques blacken the left side of the figure. This is where a little imagination works wonders because you’ve got to find the spot where you’re going to break your figure out of the shadows and let his highlights start to come through.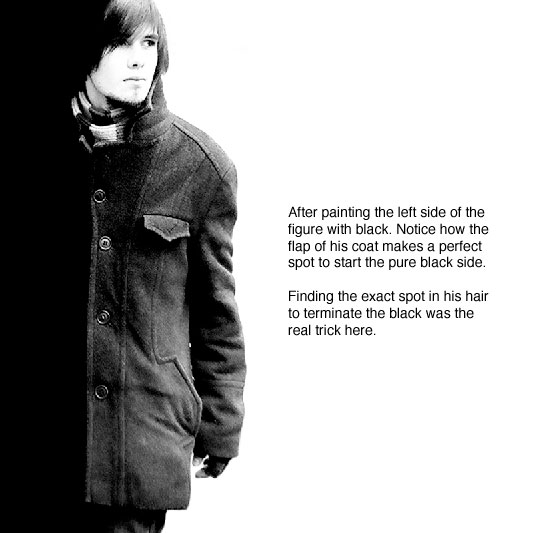
Step 11
It’s about time to get out of the Channels palette and back to our working document so lets load the Luminosity of our Alpha 1 channel by holding down the Command (PC: Ctrl) key and clicking on the channels thumbnail in the Channels palette.Now click on the RGB composite channel at the top of the Channels palette to turn the standard channels back on and switch back to the Layers tab at the top of the palette. This will return us to our working document and surprisingly you’ll discover that nothing we’ve done has effected our original image.
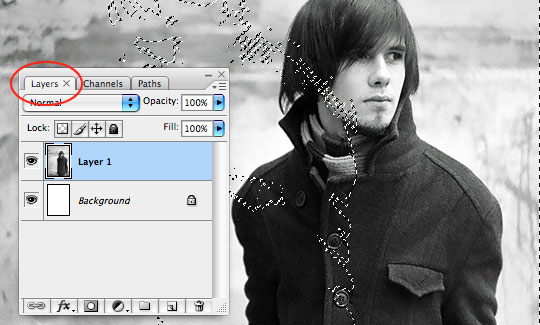
Step 12
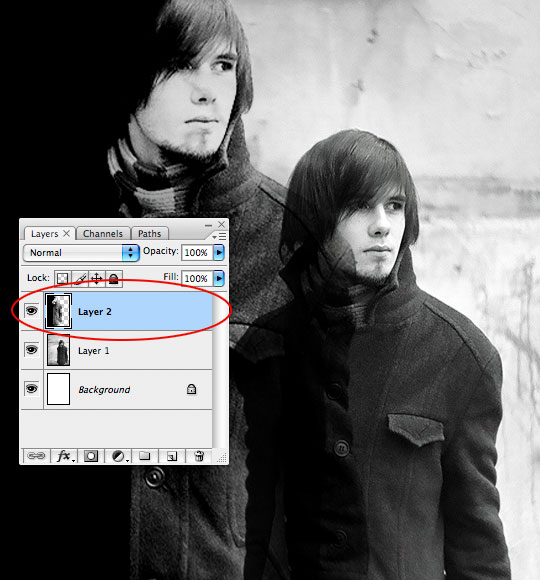
Currently we have the luminosity loaded as a selection, but what we really want here is the opposite (the shadows) loaded, so lets use what we’ve learned and choose Select>Inverse from the main menu to flip the selection.Create a new layer by pressing the Create a New Layer button at the bottom of the Layers palette and then fill the selection with black by pressing Option-Delete (PC: Alt-Backspace). At this point we’re done with the selection, so go ahead and press Command-D (PC: Ctrl-D) to deselect.
Step 13
At this juncture we’re finished with our original image, so lets go ahead and drag that layer to the trash. This leaves us with just the white background layer and the layer we just filled with black. The effect is now complete and you’re free to use either the white space to the right or the black space to the left to add copy or additional elements.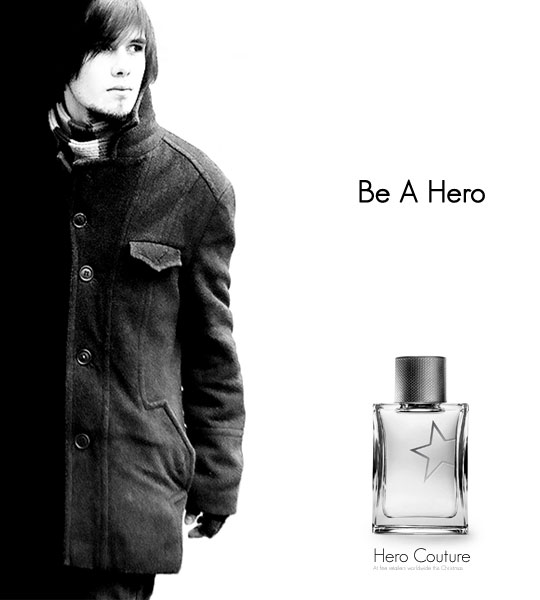

No comments:
Post a Comment