

In this tutorial, I will show you how to manipulate a portrait photo to create a splatter paint and drip effect in Photoshop. This tutorial will cover many techniques including overlay painting, blending, and coloring techniques. These techniques can also be re-used for many other projects. Let's get started!
Tutorial Assets
You will need the following assets to complete this tutorial. Please download them before you begin. If they are not available, feel free to find alternatives.1. Placing the Document
Step 1
Create a new document at a size of your preference (I used 6000x8000 pixels) by going to File > New.
Step 2
Place your stock image into the document by going to File > Place.

2. Begin Painting
We are going to be using two tools in this part of the tutorial. The Eyedropper Tool (I) and the Brush Tool (B).Step 1
The first thing we want to do is make a new layer by clicking on the new layer button in the Layers Panel.
Step 2
With the brush tool selected, set the opacity at 50% in the control panel at the top of your monitor, and set the brush to a circle with 100% hardness at the size of your choice.
Step 3
Using the Eyedropper Tool, select a color on your stock image. Switch to the Brush Tool (B), and stroke downwards. Repeat this process while alternating between the Eyedropper (I) and Brush (B) tools.
Step 4
Continue with the previous step. Switch brush sizes depending on how detailed you want your piece to get. Be sure to pay close attention to the eyes, nose, lips, and hair. The finished product should look similar to below.
3. Hue/Saturation Adjustment
Step 1
Next, we are going to add a Hue/Saturation adjustment layer by going to the adjustments panel on the right. Alternatively, you can go to Window > Adjustments and click on Hue/Saturation.
Step 2
Bring the saturation down by 30.
4. Color Balance Adjustment
Step 1
We are going to add another adjustment layer. This time it is a Color Balance adjustment. You can access this adjustment in the same manner as the Hue/Saturation adjustment shown above.
Step 2
Use the settings listed below.- Shadows: -6, 0, +11
- Midtones: -7, 0, +8
- Highlights: 0, 0, +10

5. Changing the Eye Color
Step 1
On a new layer, with a blue brush, paint over the eye as shown in the image below. Alternate between a hard and soft brush with varying opacities.
Step 2
In the layers panel, we are going to set this layer mode to Overlay.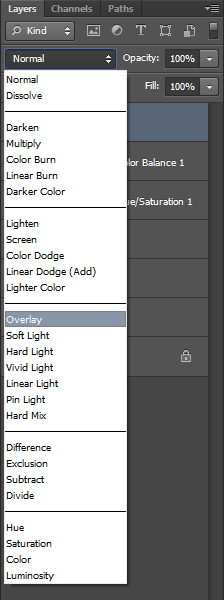

6. Adding Color
Step 1
Next comes the fun part! We are going to start adding color. Because this image is so soft and elegant, a pastel color scheme should look the best. Repeat the techniques we used in Section 2 of this tutorial but this time with a soft pink color. You should use longer strokes with a lower opacity brush.
Step 2
Continue adding different colors that match the color scheme you are looking for.
7. Changing the Background
Step 1
Change the background color from white to baby blue by using the Paint Bucket Tool. To access this tool, you must hold down on the Gradient Tool.
Step 2
Fill in the Background Layer, which was originally white.
8. Using the Lasso Tool
Step 1
We are going to use the Lasso Tool to make a selection around the neck.
Step 2
It can be a rough selection—it does not need to be precise. Be sure you have the correct layer selected!
Step 3
Hit the delete key on your keyboard to cut out the body.
9. Blending the Stock
Repeat the brush technique we used previously, but this time on a new layer. Instead of brushing on her face, we are going to select the background color using the Eyedropper Tool, and brush around the stock portrait. This blends the image into the background, and makes it more aesthetically pleasing to look at.
10. Continue Painting
If you are not content with the amount of color on the image, feel free to add more!
11. Adding Drips
Step 1
To add drips, we are going to use the same brush technique as earlier; however, this time we will be using different sizes and settings. We want to use a smaller brush and bring the opacity to about 80%. Use longer strokes like the image below shows.
Step 2
Continue doing this until you are satisfied with the result. We really want to make it look like she is melting or falling apart. You can go into more detail if you would like, too!
12. Adjustment Layers
Step 1
Now we are going to add three different adjustment layers: Vibrance, Brightness/Contrast, and a Gradient Map which can be found below.
- Vibrance: +18, +16
- Brightness/Contrast: -15, +38
- Gradient Map: Two colors
#987f78and#feff8aset this layer to Multiply with an opacity of 15%


13. Splatter Effects
Step 1
Here comes the fun part! First we are going to load the splatter brushes provided at the beginning of this tutorial. Under the brush tool settings, click the gear icon, and navigate to Load Brushes to load your brush.
Step 2
With the splatter brushes supplied in the beginning of the tutorial, begin brushing the background color over the stock image on a new layer.
Step 3
Continue doing this with different colors and sizes. You can use the same colors from her face by using the Eyedropper Tool. Reposition the brushes in a way that you like.
14. Adding a Background Texture
Step 1
Next we are going to improve the background. Using the texture supplied in the beginning of the tutorial, place it into the document until it fully covers the canvas.
Step 2
We want to add a hue/saturation adjustment; however, this time we want to only apply it to the texture layer. With the texture layer selected, go to Image > Adjustments > Hue/Saturation. Use the settings shown below.

Step 3
Set this layer to Multiply with an opacity of 30%. You can erase unnecessary parts of the texture.
15. Improving the Background
This is the most difficult part of the tutorial, so read carefully.Step 1
Create a new layer, and select the Rectangular Marquee Tool.
Step 2
Click and drag a rectangular selection somewhere onto the background.
Step 3
Using the color of your choice, fill this selection by going to Edit > Fill. Fill it with the color of your choice.
Step 4
Repeat this until you get something similar to below. To speed up the process, you can duplicate your layer after you have made a few lines.
Step 5
With the line layer selected, go to Filter > Blur > Motion Blur.
Step 6
Set the angle to 90, and the distance to 1000 pixels. Click OK.
Step 7
With the Eraser Tool, erase unnecessary or distracting parts.
16. Adding Circles
We are going to do the same thing, but use the Elliptical Marquee Tool. Also, instead of filling the selection, we are going to stroke the selection. After making your circle selection, go to Edit > Stroke. You can set the stroke width to your own preference.
Conclusion
In conclusion, I hope you learned a lot of new techniques that will benefit you in your future projects. You should now have a better understanding of how to efficiently use the Brush and Eyedropper tools to color and blend your images together in different ways. Thank you for following this tutorial!
Super posting. I am really pleased to see your way of posting to this blog.
ReplyDeleteImages Background Remover
Photo Retouch Services
Clipping path service in Bangladesh
Enjoyed reading the article on top of, explains everything in detail, the article is extremely fascinating and effective to Clipping Path Lab. Thank you and smart luck for the approaching articles.
ReplyDelete