Today’s Illustrator and Photoshop design tutorial is based on a
suggestion from one of my readers. Ella got in touch with some examples
of cool geometric gradient designs that she had seen a lot lately and
wondered how they were made. I always love receiving tutorial
suggestions, so I’ve been busy playing around to figure out how to
replicate this cool effect. Follow this step by step guide to create
your own abstract gradient pattern art using a mix of Photoshop and
Illustrator techniques.
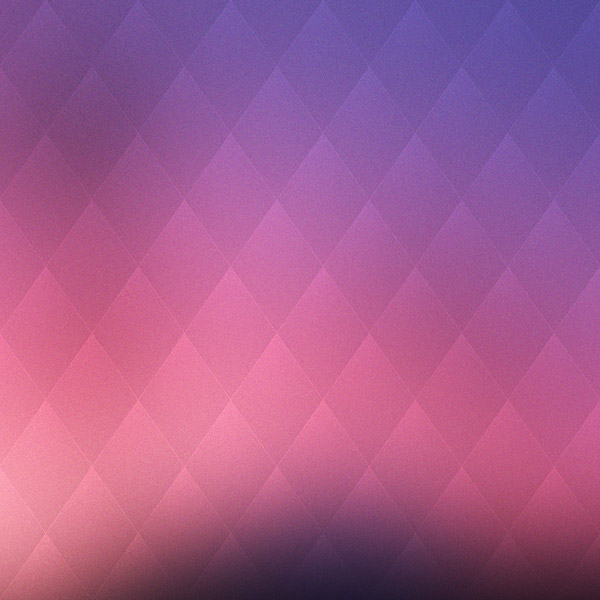
I managed to track down a sample of the artwork Ella sent over back to the ISO50 blog, where Seth Hardie shows off some amazing designs that he created using nothing but a couple of iPhone apps! The designs are essentially a geometric gradient pattern placed over a vibrant blurry background, which results in a cool piece of abstract art that’s perfect for a print, or as a background to present your other design work. Rather than experiment with this unique form of iPhone art, I’ll show you how to create a similar effect with Photoshop and Illustrator.
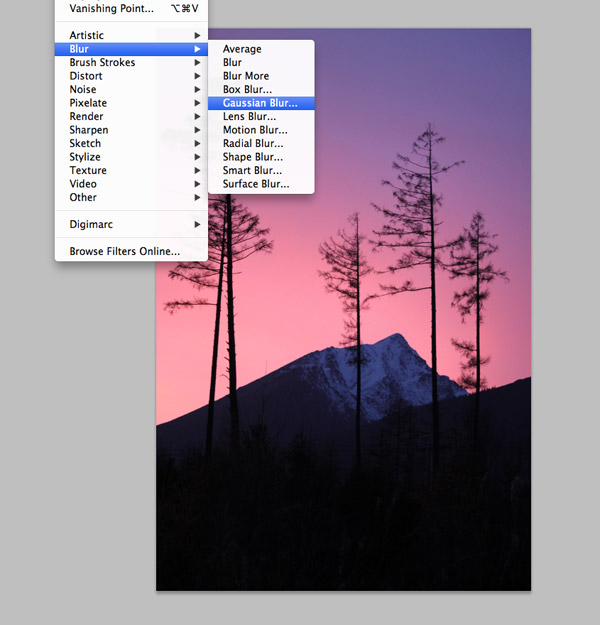
Open up a random image as the base for the blurry background. The more vibrant and colourful the image the better, so I’ve picked out a sunset image with lovely pinky purple hues. Open the image in Photoshop then add a Gaussian blur with the max settings. Repeat the blur to totally disguise the original subject of the image.
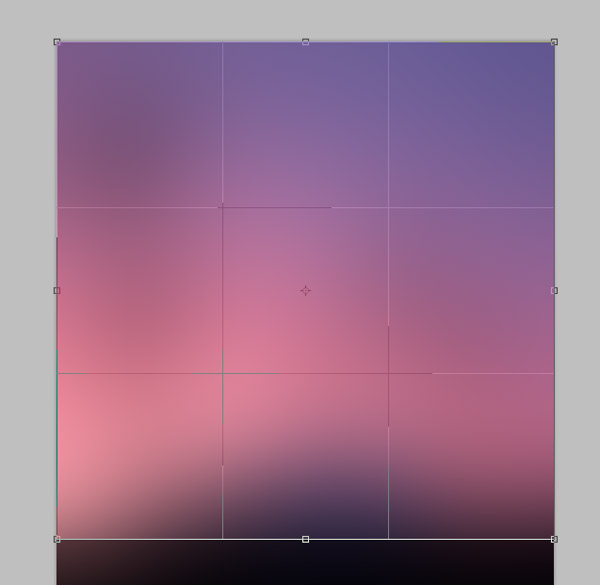
Hold Shift and drag the Crop tool across the document to trim the artwork into a square format and remove the completely black lower portion.
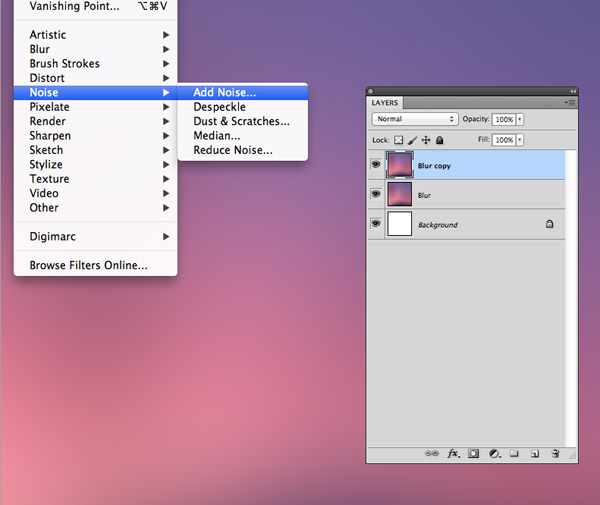
Press CMD+J to duplicate the current blur image layer, then go to Filter > Noise > Add Noise to add some subtle grain.
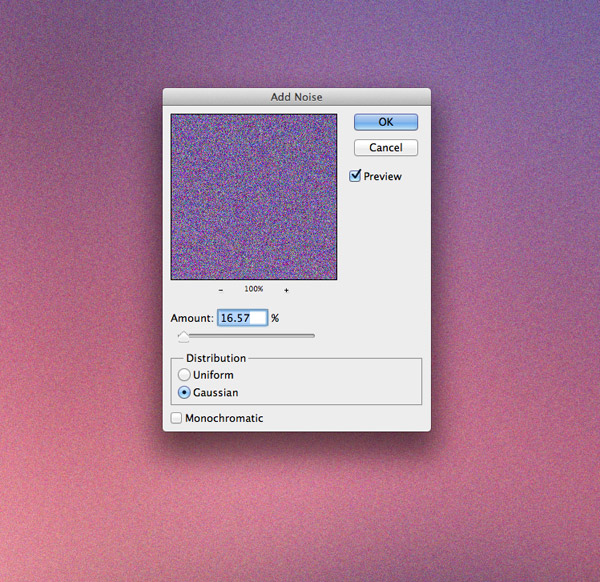
Select the Gaussian checkbox then crank up the noise amount to around 16% to add plenty of grainy speckles.
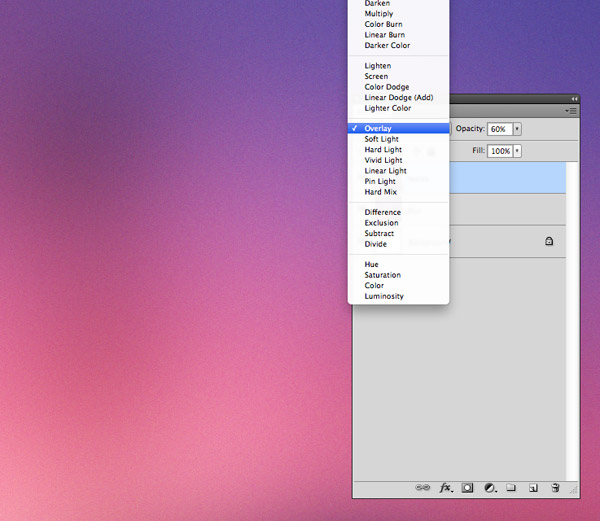
We can really intensify the colours by changing this noise layer to Overlay, then reduce the opacity to around 60% to balance the vibrancy of the colours.
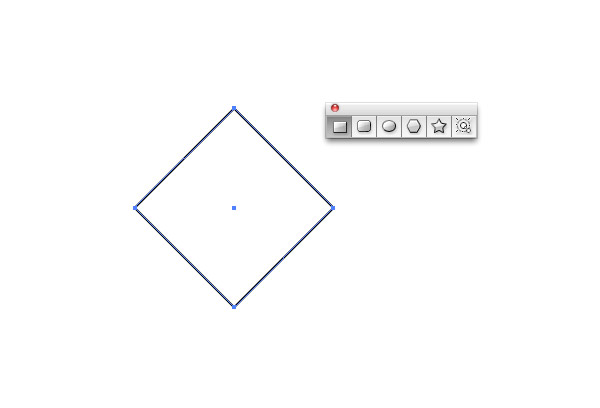
I initially tried to keep this strictly a Photoshop tutorial, but there’s no denying that Illustrator is much more capable at creating cool patterns based on shapes. Switch over to Illustrator and draw a square on the artboard (hold shift to make it proportional). Rotate it by 45° to make a diamond.
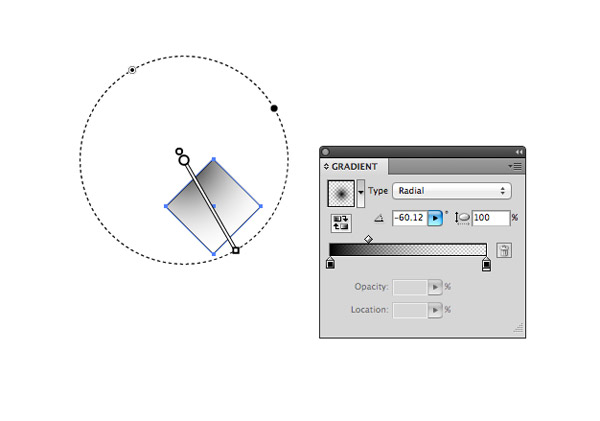
Add a black to transparent radial gradient fill, then adjust the flow using the Gradient tool by clicking and dragging across the shape.
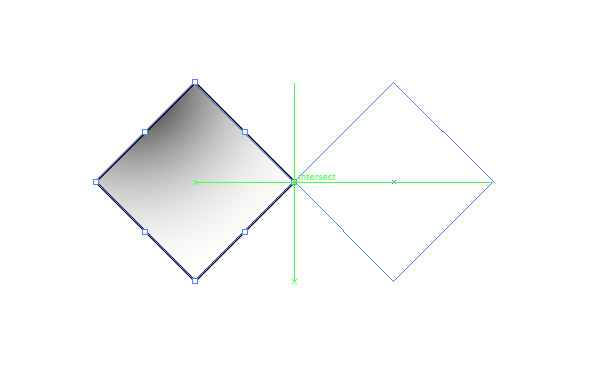
Turn on Smart Guides (CMD+U) to make the next few steps super easy. Hold the Alt and Shift keys then click and drag a duplicate of the original diamond. The green Smart Guides will snap perfectly to place the two elements side by side.
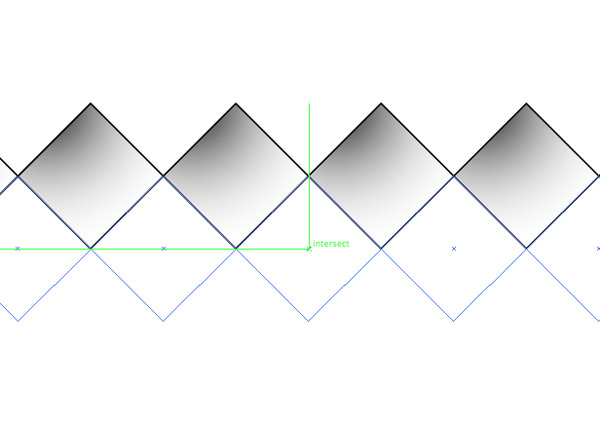
Repeatedly press the shortcut CMD+D to Transform Again to create a complete row of perfectly aligned diamond shapes. Select them all and drag out a duplicate row, this time offsetting them to fit underneath the original row.
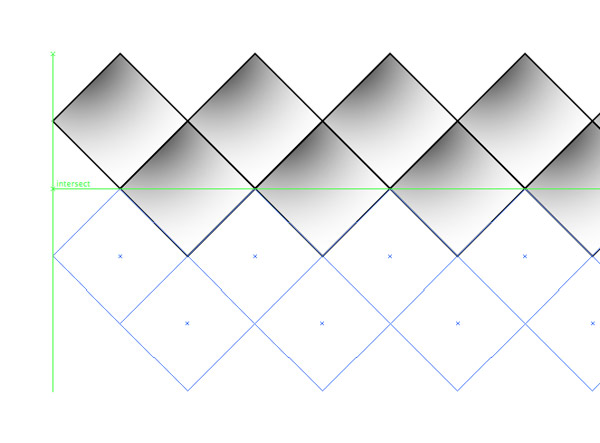
Select all the shapes that make up the two rows and duplicate them again, aligning them to extend the pattern.
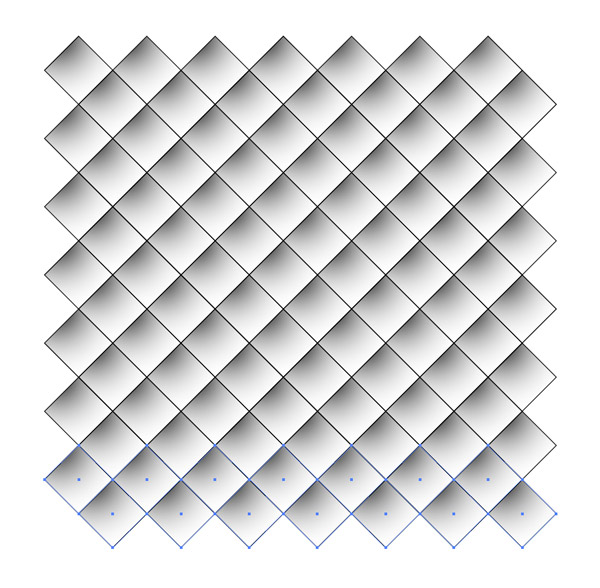
You can now hit the CMD+D shortcut to continue duplicating and aligning extra rows automatically until you have a nice series of vector gradient diamond shapes.
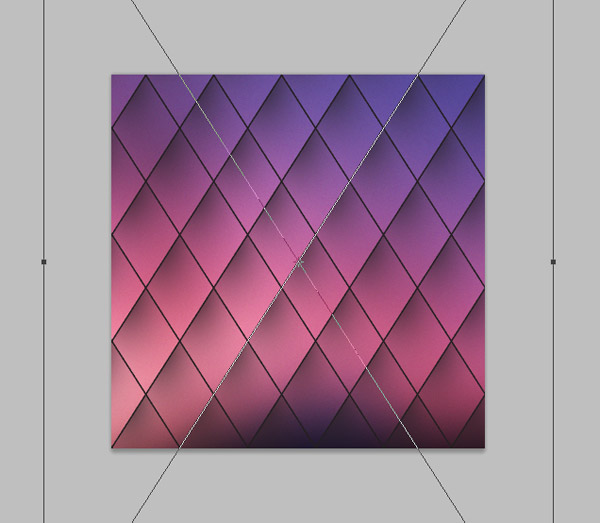
Draw a selection around all the shapes and press CMD+C to Copy, then switch over to Photoshop and press CMD+V to Paste. Select the Pixels option then scale the pattern to size over the blurry background. The elements will remain in vector format until you hit Enter, so don’t worry about scaling them up or squashing and stretching them to create a cool effect.
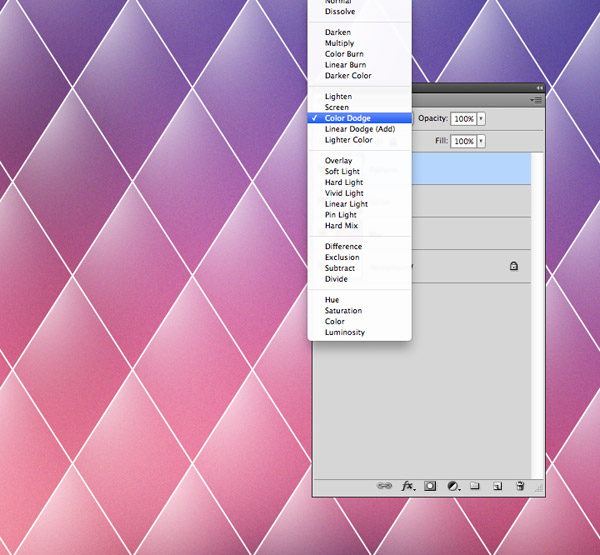
Press CMD+I to quickly Invert the pattern to turn the black artwork white, then change the blending mode to Color Dodge. This blending mode will allow the white pattern to interact with the vibrant colours of the background.
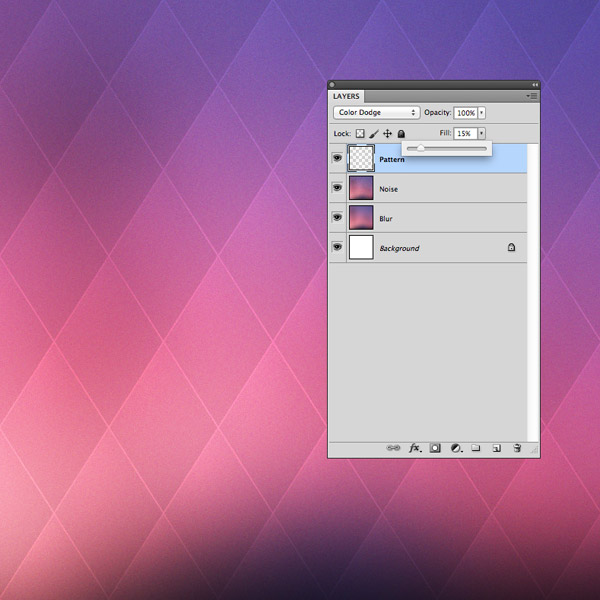
Reduce the Fill amount of the pattern layer to reduce the impact of the Color Dodge effect to create a subtle pattern overlay.

The combination of techniques in Photoshop and Illustrator makes this effect easy to produce. Creating the pattern overlay entirely in Photoshop would be much more time consuming and difficult to produce accurately, but thanks to Illustrator’s shape editing tools it’s easy to quickly create a repeating pattern to simply paste into our working document. Where Photoshop really shines is its ability to merge colours and create vibrant effects with blending modes, which is what gives this abstract artwork that cool intense appearance.
Reference: http://blog.spoongraphics.co.uk/tutorials/how-to-create-an-easy-abstract-blur-pattern-design

I managed to track down a sample of the artwork Ella sent over back to the ISO50 blog, where Seth Hardie shows off some amazing designs that he created using nothing but a couple of iPhone apps! The designs are essentially a geometric gradient pattern placed over a vibrant blurry background, which results in a cool piece of abstract art that’s perfect for a print, or as a background to present your other design work. Rather than experiment with this unique form of iPhone art, I’ll show you how to create a similar effect with Photoshop and Illustrator.

Open up a random image as the base for the blurry background. The more vibrant and colourful the image the better, so I’ve picked out a sunset image with lovely pinky purple hues. Open the image in Photoshop then add a Gaussian blur with the max settings. Repeat the blur to totally disguise the original subject of the image.

Hold Shift and drag the Crop tool across the document to trim the artwork into a square format and remove the completely black lower portion.

Press CMD+J to duplicate the current blur image layer, then go to Filter > Noise > Add Noise to add some subtle grain.

Select the Gaussian checkbox then crank up the noise amount to around 16% to add plenty of grainy speckles.

We can really intensify the colours by changing this noise layer to Overlay, then reduce the opacity to around 60% to balance the vibrancy of the colours.

I initially tried to keep this strictly a Photoshop tutorial, but there’s no denying that Illustrator is much more capable at creating cool patterns based on shapes. Switch over to Illustrator and draw a square on the artboard (hold shift to make it proportional). Rotate it by 45° to make a diamond.

Add a black to transparent radial gradient fill, then adjust the flow using the Gradient tool by clicking and dragging across the shape.

Turn on Smart Guides (CMD+U) to make the next few steps super easy. Hold the Alt and Shift keys then click and drag a duplicate of the original diamond. The green Smart Guides will snap perfectly to place the two elements side by side.

Repeatedly press the shortcut CMD+D to Transform Again to create a complete row of perfectly aligned diamond shapes. Select them all and drag out a duplicate row, this time offsetting them to fit underneath the original row.

Select all the shapes that make up the two rows and duplicate them again, aligning them to extend the pattern.

You can now hit the CMD+D shortcut to continue duplicating and aligning extra rows automatically until you have a nice series of vector gradient diamond shapes.

Draw a selection around all the shapes and press CMD+C to Copy, then switch over to Photoshop and press CMD+V to Paste. Select the Pixels option then scale the pattern to size over the blurry background. The elements will remain in vector format until you hit Enter, so don’t worry about scaling them up or squashing and stretching them to create a cool effect.

Press CMD+I to quickly Invert the pattern to turn the black artwork white, then change the blending mode to Color Dodge. This blending mode will allow the white pattern to interact with the vibrant colours of the background.

Reduce the Fill amount of the pattern layer to reduce the impact of the Color Dodge effect to create a subtle pattern overlay.

The combination of techniques in Photoshop and Illustrator makes this effect easy to produce. Creating the pattern overlay entirely in Photoshop would be much more time consuming and difficult to produce accurately, but thanks to Illustrator’s shape editing tools it’s easy to quickly create a repeating pattern to simply paste into our working document. Where Photoshop really shines is its ability to merge colours and create vibrant effects with blending modes, which is what gives this abstract artwork that cool intense appearance.
Reference: http://blog.spoongraphics.co.uk/tutorials/how-to-create-an-easy-abstract-blur-pattern-design

Colorful post. Very nice!!
ReplyDeleteImages Background Remover
Enjoyed reading the article on top of, explains everything in detail, the article is extremely fascinating and effective to Clipping Path Lab. Thank you and smart luck for the approaching articles.
ReplyDelete